Getting started with Copilot Chat in VS Code
This tutorial walks you through using the GitHub Copilot Chat extension in Visual Studio Code. You use AI-powered chat conversations to help with refactoring code, improving your code understanding, and finding your way around configuring VS Code.
If you're new to using GitHub Copilot in VS Code, see the GitHub Copilot Overview or get set up and discover the key capabilities in the GitHub Copilot Getting Started Tutorial.
If you don't yet have a Copilot subscription, you can use Copilot for free by signing up for the Copilot Free plan and get a monthly limit of completions and chat interactions.
Prerequisites
-
To use GitHub Copilot in VS Code, you must have the GitHub Copilot extension. When you install this extension, the GitHub Copilot Chat extension is also installed.
-
To use GitHub Copilot, you must have an active subscription for GitHub Copilot in your personal account, or you need to be assigned a seat by your organization.
Follow these steps to set up GitHub Copilot in VS Code by signing up for a subscription and installing the Copilot extension in VS Code.
Get your first Copilot chat conversation
Copilot Chat is a chat interface that lets you interact with GitHub Copilot, to ask and receive answers to coding-related questions. The chat interface provides access to coding information and support without requiring you to navigate documentation or search online forums.
In this tutorial, you'll be creating a simple Node.js web application.
-
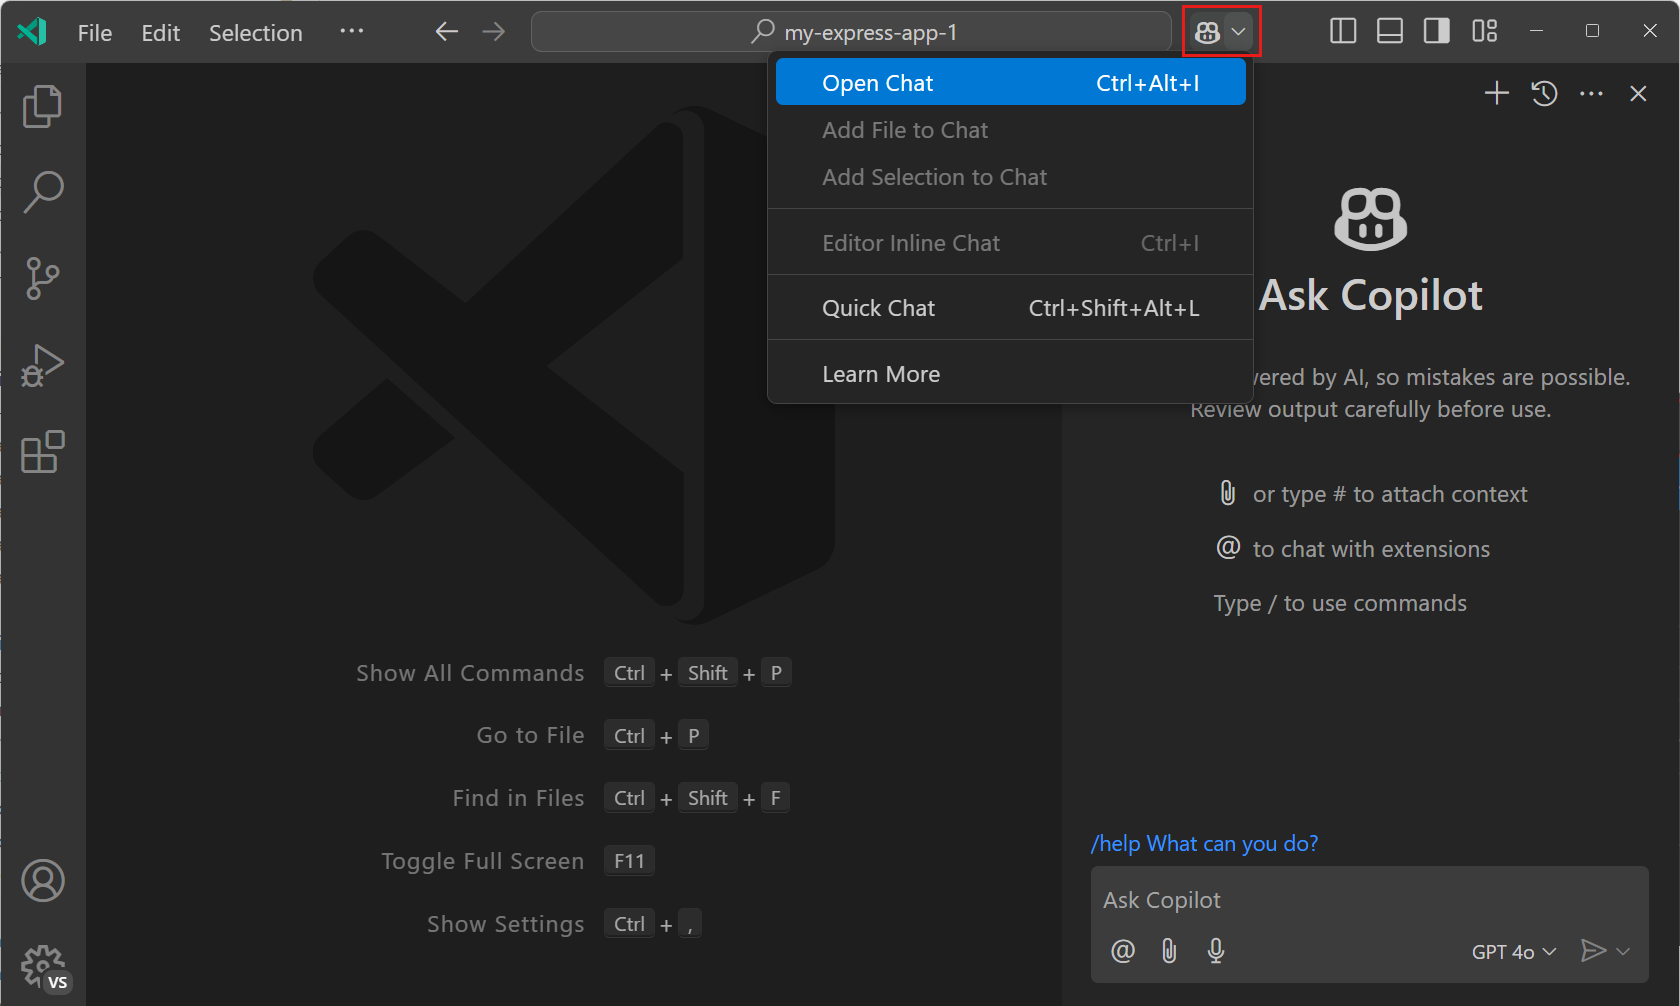
Open the Chat view from the Command Center chat menu or press ⌃⌘I (Windows, Linux Ctrl+Alt+I).
 Tip
TipYou can access different Copilot features from the Command Center menu at any time.
-
Enter @workspace /new express with typescript and pug in the chat input field, and press Enter to send the request.
Notice how this chat prompt is structured to provide clear and concise instructions to Copilot. Let's break it down:
-
@workspaceis a chat participant, which are domain experts that can perform tasks or answer questions in a specific domain. In this case,@workspaceknows about VS Code workspaces and your codebase. -
/newis a slash command that tells the@workspaceparticipant that you want to create a new workspace. Slash commands are a shorthand for commonly used instructions. You can enter the/symbol in the chat input to get the list of supported commands.
-
-
Copilot returns a file tree that represents the new workspace files, and a button to create the workspace.
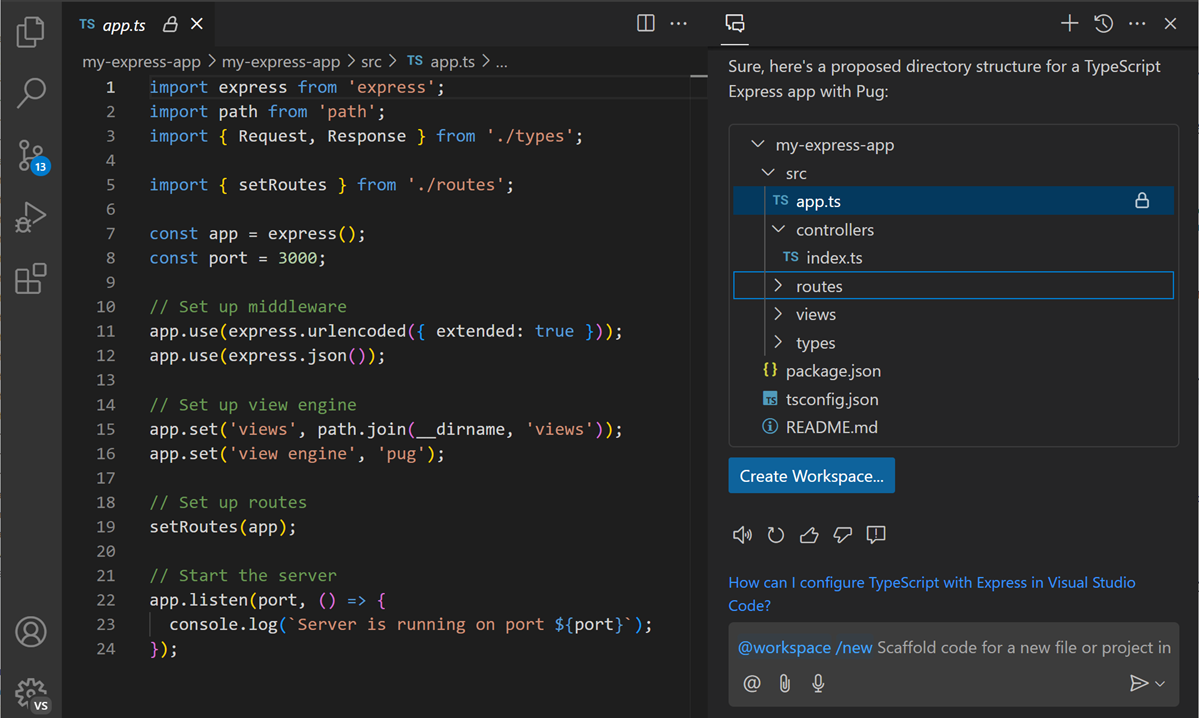
You can select any file in the file tree to preview the content before it's actually created. If you're not happy with the generated files, or want something different, you can ask follow-up questions, like
@workspace use ejsto use EJS instead of Pug. -
Select Create workspace to create a new workspace and select a folder on disk where the workspace should be created.
When the workspace creation finishes, VS Code reloads with the new workspace.
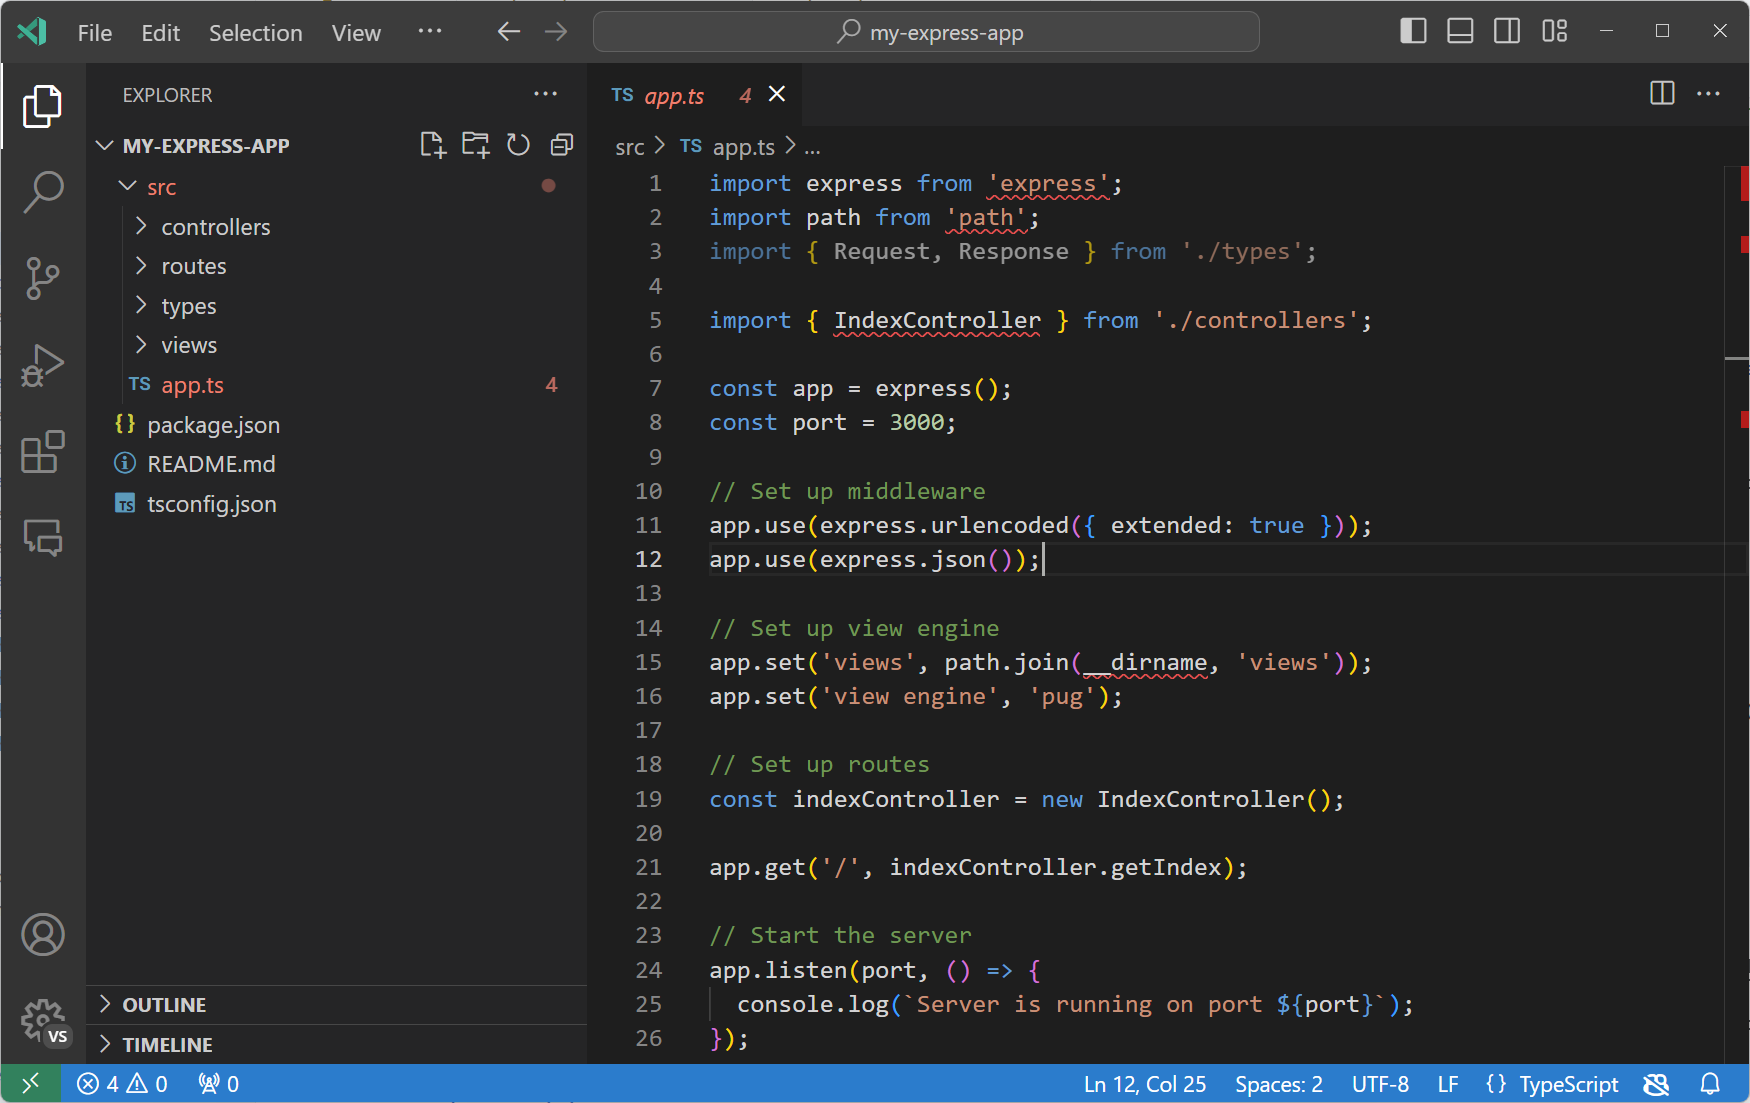
Congratulations! You've just created a workspace with Copilot Chat by using natural language. The advantage of this approach is that you tweak your request as you like. Maybe you prefer using Express.js with EJS, or not use Express.js at all and use plain Node.js with Bootstrap. Choose what you prefer most!
Use chat participants
Previously, you used the @workspace chat participant to generate a new workspace, but you can also use it to ask questions about the actual code in the workspace.
Let's iterate on our generated Express app and add a new page to it.
-
In the Chat view, enter the @workspace how to add a new page?
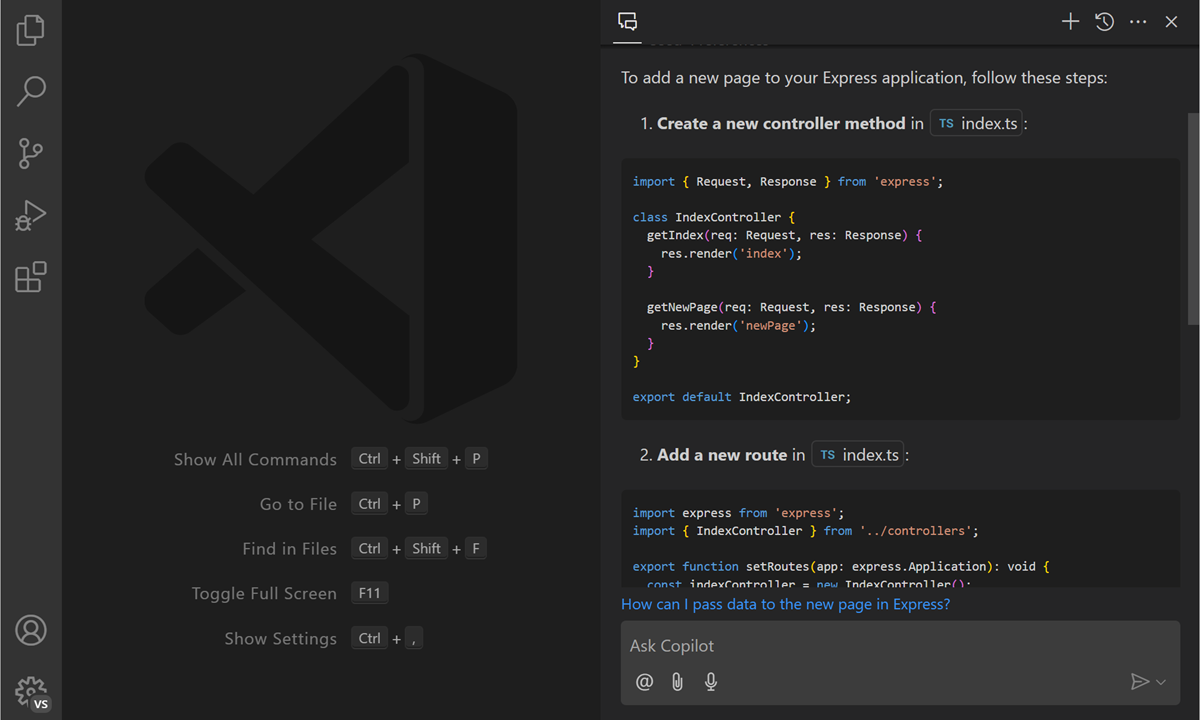
Copilot returns step-by-step instructions for adding a new page that are specific to your code. This is because you added
@workspacein the chat prompt, which has the context about your specific workspace contents. If you wouldn't include@workspace, you would get more generic instructions. -
Optionally, follow the instructions and add a new page to your app.
TipYou can add more details about the type of page you want to add, such as a home page, a contact page, or a product page.
-
There are more chat participants that you can use, each with its own domain-specific expertise. Select the icon or just type
@in the Chat view to get the list of available chat participants.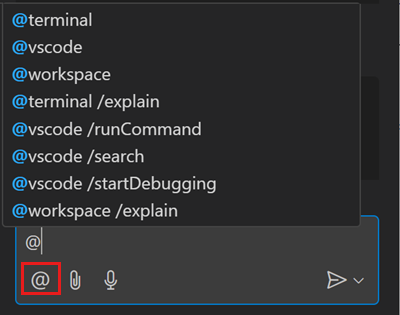 Note
NoteExtensions can also contribute chat participants, so the list might vary based on the extensions you have installed in VS Code.
-
Let's use
@vscodeto ask about VS Code. Enter@vscode how to debug node.js appin the chat input field.You get instructions about how to debug a Node.js app in VS Code, and also get a button to directly access the corresponding VS Code functionality.

Stay in the flow with Inline Chat
While the Chat view is great for keeping a conversation going with Copilot, having access to chat directly from the editor might be more efficient for particular scenarios. For example, when you're reviewing code changes, writing unit tests, or refactoring code.
Let's look at how to use chat for code refactoring.
-
Open the
app.tsfile in the editor and put the cursor on the line where the port number is set (const port = 3000).For more complex code changes, you can select a block of code to provide more context to Copilot about what you want to change.
-
Press ⌘I (Windows, Linux Ctrl+I) on your keyboard to bring up Copilot Inline Chat, or right-click and select Copilot > Start in Editor.
Copilot Inline Chat enables you to ask questions to Copilot directly from the editor.
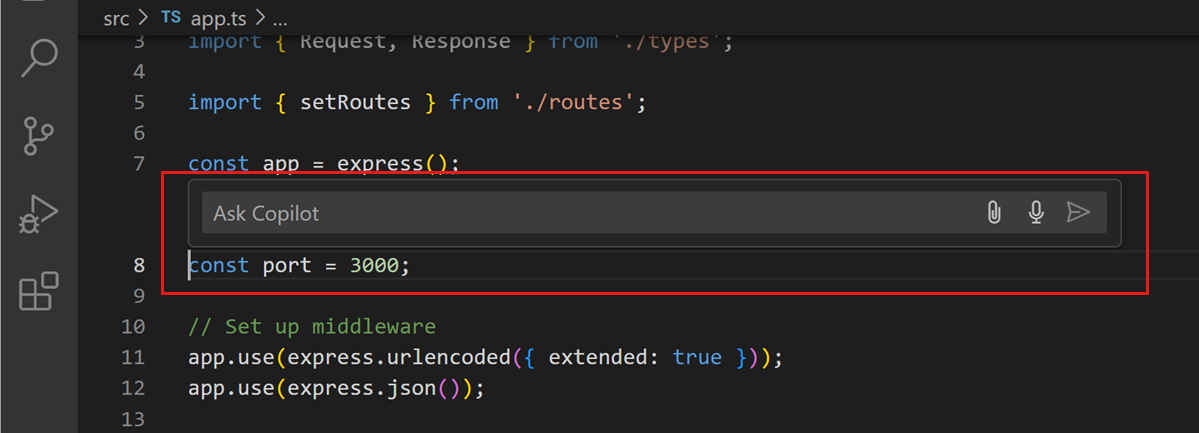
Let's now ask Copilot to refactor the code to make the port number configurable.
-
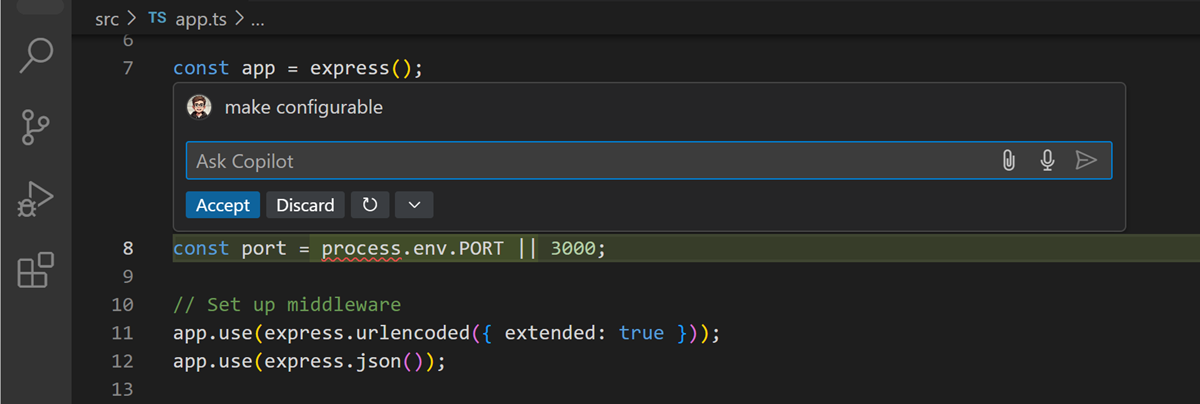
Enter make configurable in the chat input field and press Enter.
Notice how Copilot updates the selected code and suggests reading the port number from an environment variable.
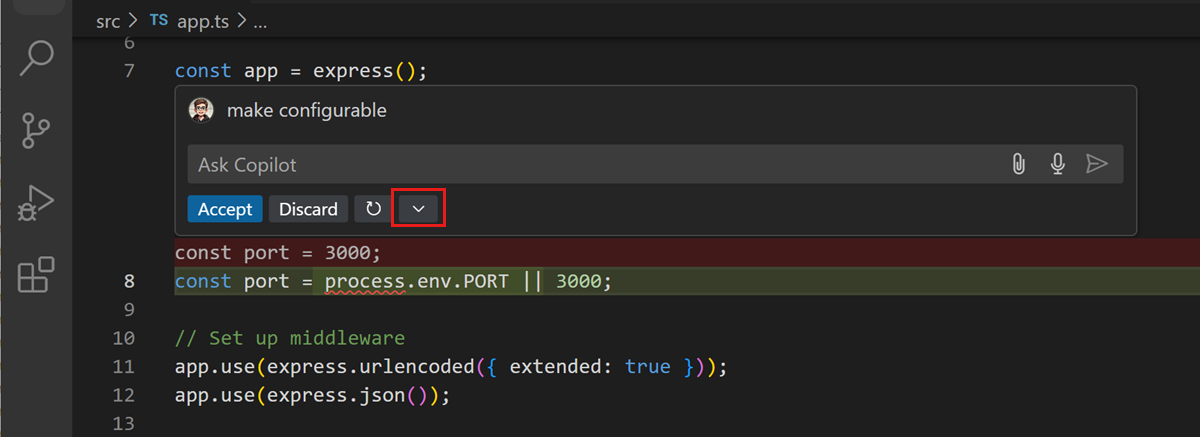
You can view the applied changes by selecting More Actions > Toggle Changes.
-
Select Accept or Discard to apply or ignore the changes.
If you're not happy with the suggested code changes, you can select the Rerun Request button to get another suggestion.
TipUse the thumbs up and thumbs down buttons to provide feedback to Copilot about the suggestions.
Congratulations on using Copilot Inline Chat in the editor to help you with code refactoring!
Use smart actions
There are some common scenarios where you might invoke Copilot directly, without having to enter a chat prompt. For example, Copilot can help with adding code documentation, generating unit tests, or help you fix coding errors.
Let's see how to use smart actions to fix a coding error.
-
Open the
app.tsfile and select one of the symbols that has a red squiggle. -
Select the sparkle icon to view the Copilot code actions, and then select Fix using Copilot.
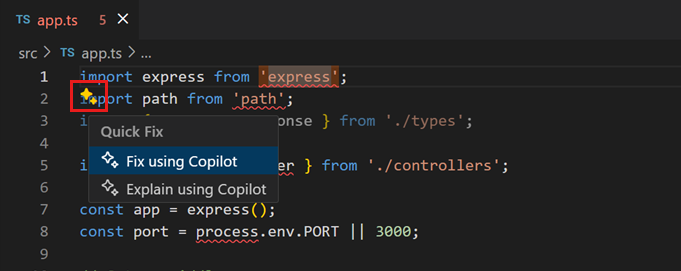
-
Copilot Inline Chat comes up, prepopulated with the error message, and a suggestion to resolve the problem.
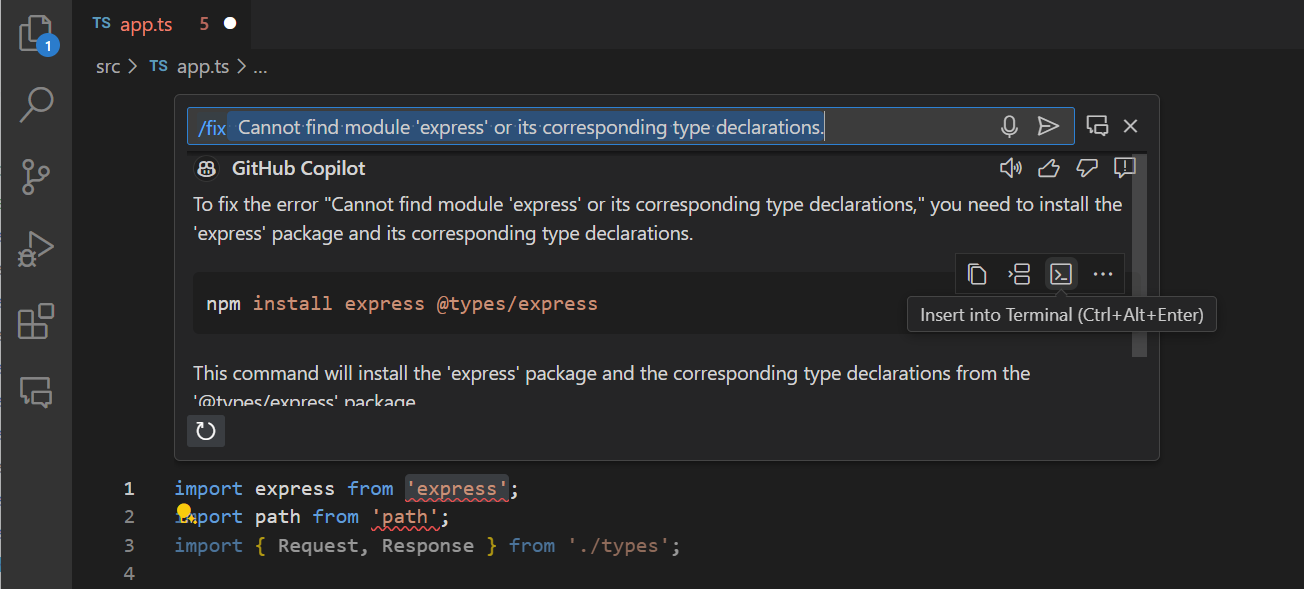
Notice how Copilot uses the
/fixslash command, followed by the error message. You can also use the/fixcommand directly in the chat input field to get help with fixing coding errors.
In addition to Fix, Copilot provides more smart code actions, such as Explain (/explain), Generate Docs (/doc), and Generate Tests (/tests). You can access these actions via the editor context menu and then selecting Copilot.
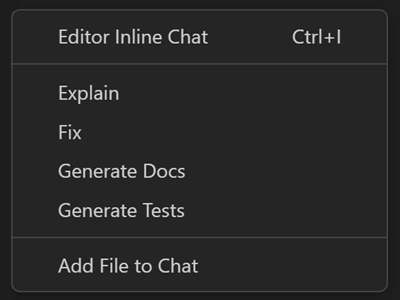
And if you come across some block of code that's unclear, just select it and use /explain to get Copilot to give you an explanation and help improve your code understanding.
Add chat context
Previously, you used @workspace to ask questions about your workspace. What if you want to ask Copilot a question about something specific, maybe a particular file or a symbol in your code? How can you provide that context to Copilot without having to describe everything extensively in natural language?
Let's ask Copilot about what the purpose of a specific file in the workspace is.
-
Open the Chat view from the Command Center chat menu or press ⌃⌘I (Windows, Linux Ctrl+Alt+I).
-
Select the Attach Context button next to the chat input field to open the context Quick Pick.
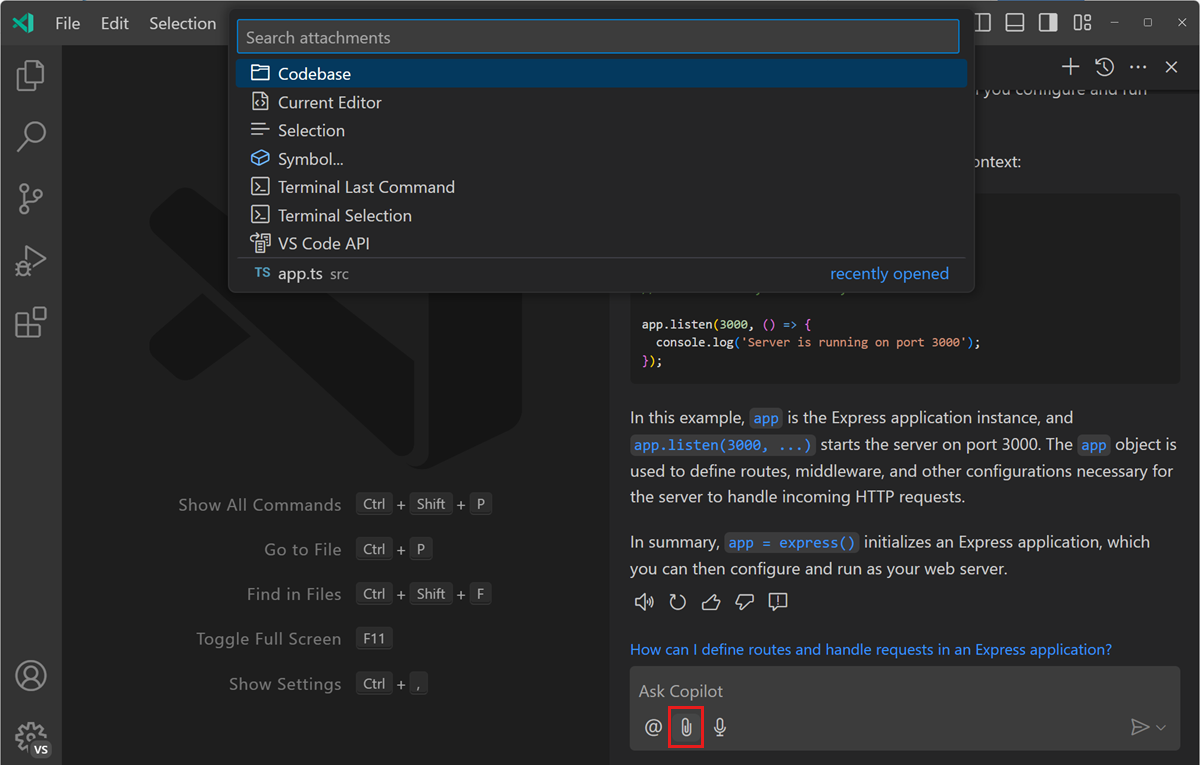
In the context Quick Pick, you can select different types of context to add to your chat prompt, such as a file from your workspace, a symbol, the current selection, and more.
-
Start typing
index.tsto find the corresponding file, and then select thesrc\types\index.tsfile.
After you select the file, notice that the file is added in the Chat view. Optionally, you can add more files or other context types to your chat prompt.
-
Now enter the following prompt in the chat input field: @workspace what does this do. Then, press Enter to send the request.

Copilot now returns an explanation about the purpose of the code in the selected file.
-
Instead of using the Attach Context control, you can also directly reference the different types of context by typing
#in the chat input field.TipAdd
#codebaseto add your entire workspace as context to your chat prompt. This can be useful if you want to ask questions that relate to different areas of your project. -
To quickly attach a file as context for your chat prompt, drag and drop a file from the Explorer view onto the Chat view. If the file is open in the editor, you can also drag and drop the editor tab onto the Chat view to attach the file.
Congratulations
Congratulations, you successfully used the GitHub Copilot Chat extension to have AI-powered conversations to help refactor your code, fix problems, or improve your code understanding.
Additional resources
- Get an overview of Copilot Chat in VS Code
- Optimize your Copilot experience with prompt crafting and context setting